What should you actually know about tires before taking a car out on your own? Start with four abilities: find the vehicle's recommended cold pressures, measure them with a gauge, recognize a tire problem that needs help, and describe what you noticed without guessing at the cause. You do not need to become a mechanic. You do need a reliable way to decide whether today's trip should start.
This guide is for someone newly licensed, learning to drive, or taking responsibility for a car for the first time in Calgary. It also gives a parent, partner or driving mentor a practical teaching sequence. The aim is independence, not an intimidating vocabulary test. Being able to say “the right rear measured lower than yesterday, and I have not driven yet” is more useful than memorizing ten tire brands.
A licence demonstrates driving knowledge and ability under the applicable testing process. It does not tell you the condition of the particular car waiting outside. A familiar family vehicle can have an unfamiliar tire problem. A recently purchased vehicle can arrive without complete records. Treat the first drive as the start of your own evidence, not proof that somebody else has already checked everything.
1. Learn on the car you will actually drive
Arrange a short, unhurried practice session while the car is parked securely in a suitable location. Use daylight if possible. Bring its owner's manual, a pressure gauge and a phone or notebook. Do not begin beside moving traffic, with an unstable vehicle, or when anyone is rushing to leave. No part of this beginner exercise requires lifting the car or getting underneath it.
Ask the experienced person to demonstrate one task, then hand it over. Watching someone read a gauge is not the same as getting a repeatable reading yourself. If the valve is awkwardly positioned, move the vehicle only if it is safe to do so, then secure it again. Stop the exercise if a tire looks seriously damaged or visibly flat. That situation needs assessment rather than a driving lesson.
Locate the driver's door opening, the tire information label, the valve on each wheel, the owner's manual and the vehicle's roadside-assistance information. Identify which wheel is front left, front right, rear left and rear right from the seated driver's perspective. This simple naming convention prevents confusion when another person faces the car from outside and reverses left and right.
The learning goal is a completed action, not a confident nod. Ask the learner to point to the pressure specification and explain when it applies. Then ask them to find the assistance number without searching through somebody else's messages. KMJ's practical tire-care information can support the learning session, but the specific vehicle's instructions remain the reference for its equipment and requirements.
2. Make a one-page vehicle tire card
Create a small reference card with the vehicle year, make, model, wheel positions, specified cold pressures and the location of the original information. Include the date the information was copied. If the label shows separate front and rear values, give them separate fields. A single number written beside “tires” can become an incorrect instruction for half the car.
Add the tire sizes actually present on the vehicle and note whether they agree with the label and manual. Do not automatically resolve a mismatch by copying the sidewall into your card as the approved size. Wheels may have been changed. Some vehicles legitimately use different front and rear sizes. An unexplained difference is a question for a qualified tire professional and the vehicle manufacturer information.
Keep a photo of the placard and a clear photo of each tire's sidewall markings. Photographs can save repeated trips outside when discussing a replacement, but they do not replace an inspection. A dark image of a dirty sidewall may hide a letter that changes the specification. Retake an unreadable picture while safely parked instead of inviting someone to guess.
The card should also identify the responsible owner and who can authorize spending if the driver is using a family car. That is an administrative point, not permission to continue on a questionable tire while waiting for a reply. Agree in advance that stopping a trip for a genuine safety concern is acceptable. The cost conversation can follow once everybody is in a suitable place.
3. Separate the three numbers beginners often confuse
Tire size, inflation pressure and tread depth answer different questions. Size describes the tire's dimensional designation and construction information. Inflation pressure describes the air pressure under a stated condition. Tread depth describes remaining groove depth at measured points. A tire can have the correct size and still be underinflated, worn unevenly or damaged.
The pressure printed on a tire sidewall is not the everyday target to substitute for the vehicle placard. Transport Canada directs drivers to the vehicle manufacturer's recommended pressure. That information is commonly on the tire information label, with further instructions in the manual. The tire itself may fit several vehicles whose loading and operating requirements differ.
Units matter as much as the number. A gauge can display psi, kPa or another scale. Write the unit every time. Do not transfer a number from a kPa label to a psi display. If you accidentally change the gauge's mode, find the correct mode before continuing. There is no advantage in doing a mental conversion under pressure when the tool and reference can be set to matching units.
For size markings, use tire sidewall identification help to understand what you are reading, then preserve the entire designation when requesting advice. Leaving off a load index or construction prefix can turn a precise request into an incomplete one. A novice does not need to interpret every symbol immediately; copying the complete information accurately is already a valuable skill.
4. Practise a cold-pressure check from beginning to end
Transport Canada explains that pressure should be checked when tires are cold, rather than after driving has warmed them. Its guidance describes a vehicle stationary for at least three hours, or driven no more than two kilometres. An easy household routine is to check before the first drive after the car has been parked overnight. Consult the specific manual when its instructions add requirements.
Remove the valve cap and place it somewhere it will not disappear. Seat the gauge squarely on the valve. A sustained hiss generally means air is escaping while the tool is not properly sealed; reposition it rather than waiting for a believable number. Read the result, remove the gauge and repeat if the reading seems inconsistent. Replace the cap when finished.
Compare each reading with the specified value for that position. If adjustment is needed, use suitable equipment according to its instructions and remeasure. A beginner who is uncertain about using an inflator should have someone demonstrate it in a safe setting. A visibly flat tire, damaged tire or tire that will not hold pressure requires assessment, not an improvised lesson in adding more air.
Do not bleed a warm tire down to a cold-pressure specification. Driving can raise pressure, and comparing that warm reading with a cold target without recognizing the difference can leave the tire underinflated after it cools. Record that the reading was taken after driving and arrange a proper cold check. This is an example of a useful measurement being unsuitable for a particular decision.
5. Build a record that can reveal a change
A pressure note needs a date, wheel position, reading, unit and whether the tire was cold. Record the specified target separately from the measured result. If you adjust the tire, save both the before and after readings. “Checked tires” is a reminder that an activity happened; it cannot show which tire was low or whether a previous concern returned.
Consider a hypothetical learner whose first cold check finds three similar readings and one noticeably lower reading. The next step is not to assume the fourth tire simply needs a different target. They verify the vehicle instructions, check the measurement again and have the loss investigated if appropriate. A repeating discrepancy at the same position is more informative than a single number with no context.
Weather changes can affect pressure across the set, but do not use a cold morning as an automatic explanation for one tire repeatedly losing air. Likewise, do not promise that every tire changing together proves there is no leak. Record observations and let the appropriate inspection answer the cause. Your notebook is there to improve the handoff, not to certify the vehicle remotely.
Transport Canada recommends checking inflation at least monthly. Also make a pressure check part of your preparation before a long trip. Put a recurring reminder somewhere the driver already looks. Add checks when there is a concern rather than waiting for the next calendar reminder. If the family changes who drives the car, keep the same record accessible so the new driver does not unknowingly start the investigation again.
6. Do a walk-around without pretending it is a full inspection
Before departure, look for an obviously low tire, an unusual bulge, exposed material, a serious cut, or something lodged in the tread. Check from a position where you are not exposed to moving traffic. You are looking for reasons to pause and investigate. A quick walk-around does not reveal all internal damage and cannot demonstrate that pressure is correct.
Avoid pulling out a nail or screw as a test. It may be limiting air loss, and removing it can change the situation. Take a photograph if that can be done safely, note the wheel position and seek advice. A photograph helps explain location and appearance; it cannot establish whether a puncture is safely repairable or whether the tire was damaged while underinflated.
A curb scrape deserves an honest description. Record whether the wheel struck the curb, whether a tire is losing air and whether handling changed. Do not dismiss the event because the driver feels embarrassed, and do not label every cosmetic mark structural damage. A qualified assessment distinguishes what can be observed from what requires examination. Serious visible damage or an unsafe feel is a reason not to continue the trip.
The tire's inner sidewall and the tread resting on the ground may not be visible during a normal walk-around. Never crawl under an unsupported vehicle to complete a checklist. When an inaccessible area matters, have it inspected appropriately. The safe beginner skill is recognizing the limits of the view, not trying to achieve an exhaustive inspection in a driveway.
7. Learn tread measurement as a supervised skill
A tread-depth gauge makes a measurement more useful than “it looks okay.” Have an experienced person show how its base sits on the tread and how the probe reaches the groove. Measure at several suitable locations around the circumference and across the tread, following the tire and gauge guidance. Avoid making your only measurement on a raised wear indicator.
Write the unit alongside each value. Millimetres and fractions of an inch are different ways to report depth; switching between them without noticing creates confusion. Keep the least favourable valid readings rather than averaging away a worn section. If one area is much shallower, preserve the location in your notes. The pattern may be as important to an inspection as the deepest number.
Transport Canada discusses tread wear indicators and minimum remaining tread in its tire-safety guidance, and it gives more conservative advice for snow-covered roads. A minimum wear indication is not a promise of adequate winter performance. Water, snow, tire type and wear pattern all affect the decision. Ask for a suitability assessment for the intended season, not simply whether the tire has reached its final wear indicator.
A learner should be able to demonstrate one repeatable measurement and explain its limits. They should not be asked to certify the remaining life of a set after one practice session. If measurements conflict or a tire appears unevenly worn, get help. A useful outcome is “I can show where the reading came from,” rather than a confident but unsupported prediction about how many kilometres remain.
8. Treat a dashboard warning as information, not a diagnosis
A tire-pressure monitoring system is helpful, but it does not replace a gauge or scheduled checks. Learn the exact symbol and the manual's explanation for the vehicle you drive. Some vehicles display individual pressures, while others give less detail. The absence of a warning is not proof that all tires are at their specified cold pressures.
If a warning appears while driving, maintain control, avoid abrupt manoeuvres and stop at a safe location to assess the situation. If handling becomes unstable or the tire appears flat or damaged, arrange assistance rather than proceeding to an inflator by habit. The distance to a convenient station does not establish that the tire can safely make the journey.
A flashing indication, a steady indication and a message about a monitoring-system fault can mean different things depending on the vehicle. Consult its manual. Do not clear or reset a warning simply to make the dashboard quiet. A reset or relearn procedure, where required, belongs after the relevant cause and pressure condition have been addressed according to the instructions.
For a learning exercise, ask the driver to describe what they would do if the symbol appeared on a familiar road. They should identify a safe stopping strategy, the information they would gather and whom they would contact. Do not create an actual fault or deliberately deflate a tire for practice. A written scenario provides the learning without creating a vehicle problem.
9. Understand what winter tire choices can and cannot do
Calgary's winter driving demands more than recognizing snow on the ground. Tire selection and trip decisions should account for the temperatures and surfaces you expect to encounter. A learner may drive a different schedule from the household's experienced driver, such as early morning classes or evening work. Describe those conditions when discussing a seasonal set.
Transport Canada recommends winter tires in sets of four for winter driving. Do not build a beginner's confidence around the idea that two winter tires, four-wheel drive or a large vehicle can replace a suitable complete set. Acceleration and the ability to get moving are only parts of the driving task. Steering and stopping also depend on the available grip and the way the driver uses it.
Read Calgary winter tire selection guidance with the learner and identify the questions that apply to the actual vehicle. Then distinguish that category from all-weather tire options and all-season tire information. Names are not substitutes for checking the exact product's markings, purpose and suitability.
No tire purchase grants permission to drive at normal dry-road speeds in poor conditions. Leave more space when needed, follow official road and weather information, and postpone a trip when conditions exceed your ability or the vehicle's suitability. A family plan should make postponement a legitimate choice. Requiring a novice to prove confidence during hazardous weather teaches the wrong lesson.
10. Recognize the limits of a tire photograph
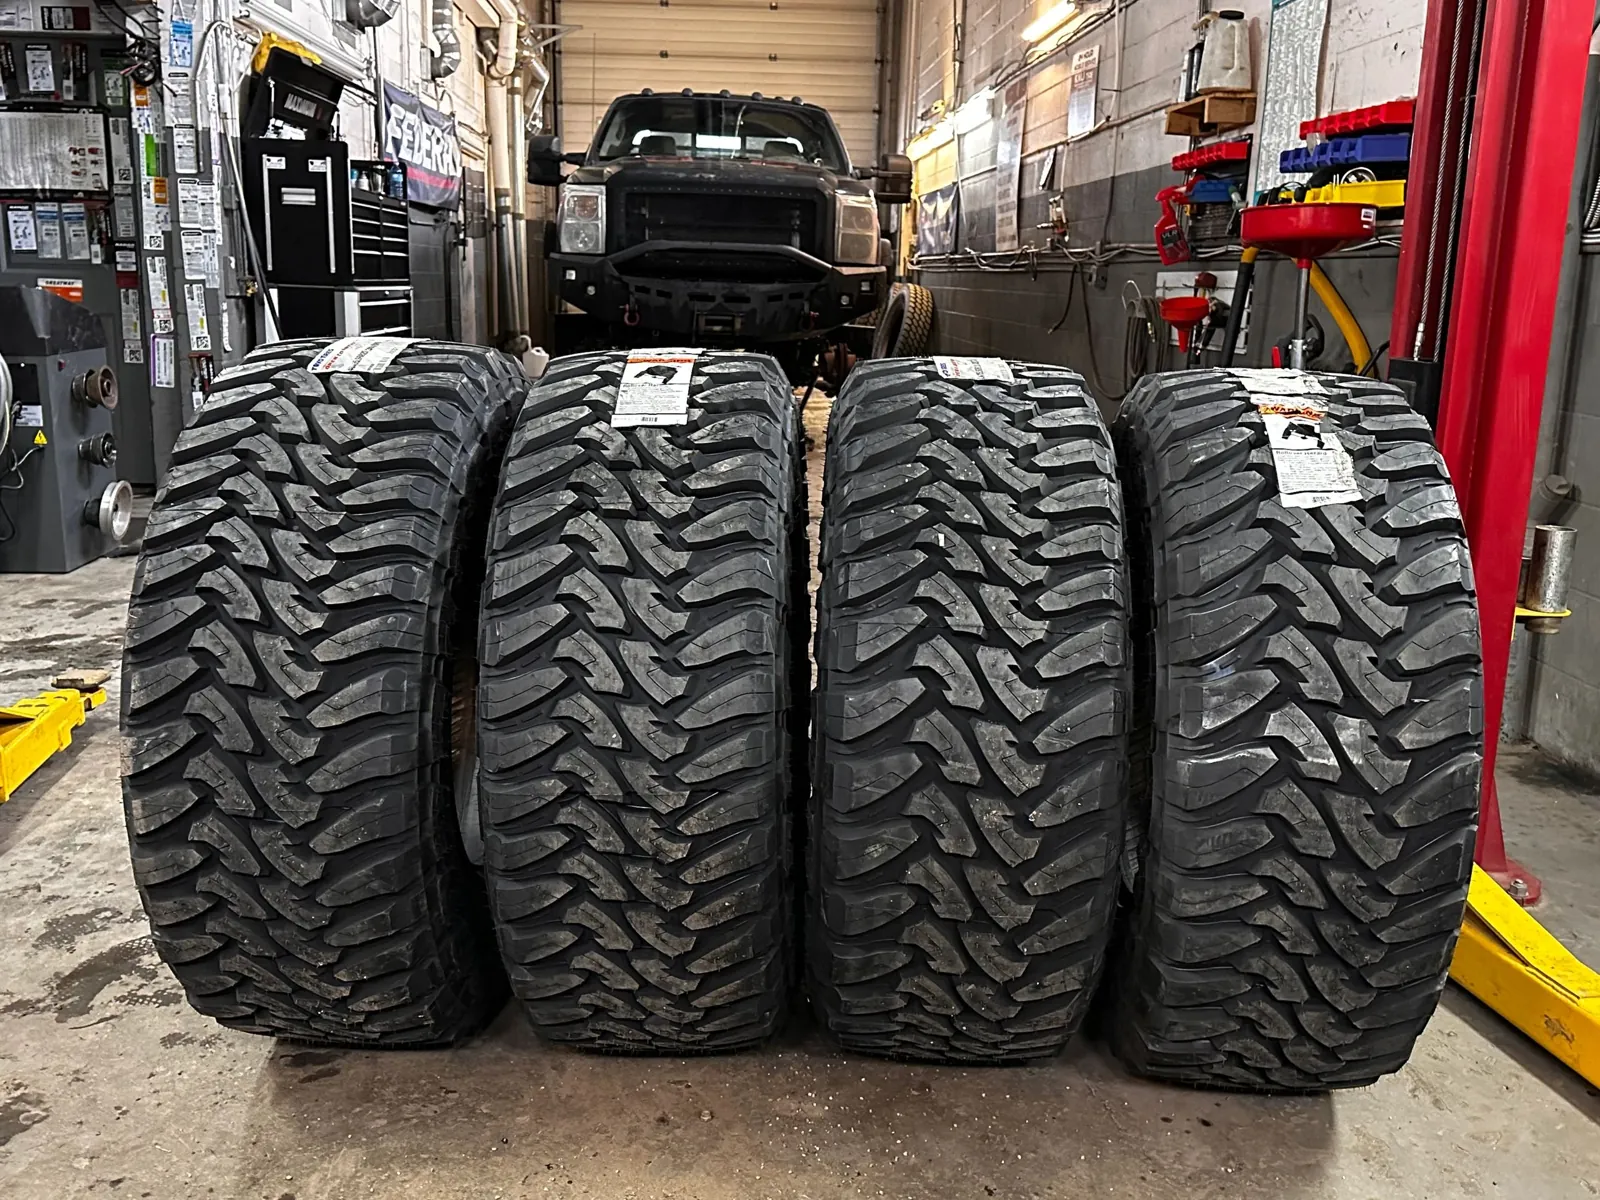
The photograph accompanying this guide shows four unmounted aggressive-tread tires with product labels in a KMJ work area. It is useful for seeing tread blocks, grooves and the difference between a loose tire and a complete mounted wheel assembly. It is not a recommendation that a new driver choose that tread type, nor proof of current inventory or suitability for a particular car.
Online pictures are especially easy to overinterpret. A deep-looking groove may reflect lighting. A tire photographed from the tread face may conceal its sidewall specification. A label can identify one photographed product without establishing the specification of a different product offered later. Ask for the written details of the exact tire being considered instead of making a decision from appearance alone.
The same caution applies to your own damage photos. Include a wider view that identifies the wheel position and a close view of the concern, but do not place yourself in danger to obtain either. Avoid putting hands into a tread area where a sharp object may be present. Keep the original pictures so the person assessing them can zoom without losing detail from repeated message compression.
A useful question is “What does this photograph actually establish?” Often the answer is a location, visible marking or external condition. It rarely establishes internal condition, remaining safe life or approved fitment. Learning this distinction makes a novice less vulnerable to a persuasive advertisement and more effective when requesting real assistance.
11. Request a tire recommendation with enough information
Before requesting options, gather the vehicle details, current tire designation, placard information and whether the wheels are original or changed. Explain your driving use in ordinary language: local commuting, regular highway travel, seasonal mountain trips or a vehicle that is often heavily loaded. Avoid claiming a special requirement simply because a friend chose a certain tire.
Tell the provider what you value and what you can compromise on. Wet-weather performance, winter suitability, ride comfort, noise and purchase cost may all matter, but they are not interchangeable specifications. The correct size and adequate load capability come before preferences. Use tire load-index guidance to understand the question, not to approve a lower-rated substitute yourself.
A brand name alone is incomplete. A manufacturer can sell several categories and models for very different uses. The tire brands information page provides a starting point, while the actual recommendation should name the model and full specification. Ask what makes it appropriate for this vehicle and season. An explanation tied to your use is more useful than a claim that everybody buys it.
If you are purchasing for a vehicle you share, involve the person who controls its maintenance records. They may know about wheel changes or manufacturer instructions that you have not seen. Do not let that become a barrier to learning: have them explain the information and save it on the vehicle card. Next time, the driver should be able to supply it independently.
12. Compare written quotes without reducing everything to price
A clear quote identifies the tire model, size, service description and applicable charges. Ask what is included and what remains conditional on inspection. Do not assume that a price for tires alone includes mounting, balancing or other items. Equally, do not assume a more detailed quote is more expensive until you have compared the same scope.
For example, imagine one written option describes four tires and another describes four tires plus installation work. Those are different offers even before you compare models. Write a simple side-by-side list of included items and ask for the missing details. There is no need to invent an all-in amount from incomplete information or to challenge a provider about a charge you have not understood.
Read how to approach a Calgary tire purchase and budget versus premium tire considerations as decision support. A lower purchase cost does not prove poor suitability, and a higher price does not automatically prove the best fit for your use. Keep the comparison attached to verified specifications, intended conditions and the services actually included.
Agree on who can approve changes if inspection finds something unexpected. A novice using a parent's vehicle may need an owner decision for additional work. Set a reachable contact and a spending process before handing over the keys. The provider should not need to infer authorization from a vague “do whatever it needs,” and the learner should not feel pressured to approve something they cannot explain.
13. Name the service correctly before arranging it
A seasonal wheel swap generally involves removing complete tire-and-wheel assemblies and installing another complete set. Changing loose tires on the same wheels requires mounting work as well. Tell the provider whether your second set has wheels inside it. “I have four winter tires” does not answer that question, and the distinction affects the work being planned.
Use seasonal tire-change service information to prepare a precise description. You can say, “My other set is four loose tires without wheels,” or “My other set is already mounted on its own wheels.” If you do not know, a clear photograph can help establish that basic distinction. Do not remove anything from the vehicle to answer the question.
Balancing concerns the tire-and-wheel assembly's mass distribution. It is not another name for correcting every vibration or for mechanical alignment work. The wheel-balancing information can help explain that service, but a new vibration should still be described rather than self-diagnosed. Some causes of vibration are outside tire service and require an appropriate mechanical specialist.
KMJ's service scope here is tires and oil changes. Do not interpret a tire assessment as a claim that KMJ provides brakes, suspension work or other mechanical repairs. When symptoms need a different specialist, the useful result is knowing where the tire-service boundary ends. A responsible handoff is better than asking for the wrong operation because the name sounds familiar.
14. Plan the visit and the handover
Choose a service arrangement suitable for the vehicle, location and work. If considering mobile tire service, explain the parking surface, access restrictions and available work area, then let the provider confirm suitability. Do not assume that a narrow roadside space, steep driveway or busy public lot can become a safe worksite because it is convenient.
Check the Calgary service-area information and use the online tire appointment page for the available scheduling process. A submitted request is not necessarily a confirmed time. Keep the confirmation and any preparation instructions. This guide does not promise availability, same-day service or access to any specific location.
Before the visit, find the wheel-lock key if the vehicle uses one. Remove clutter that prevents access to the relevant items, but do not loosen fasteners or prepare the vehicle by lifting it yourself. Bring the vehicle tire card, your symptom notes and the second set only as instructed. Ensure any transported load is secured according to the vehicle's loading guidance.
At the handover, lead with the reason for the visit: “seasonal change,” “repeated air loss at rear right,” or “new vibration after an impact.” Then provide the timeline and relevant readings. Mention any temporary sealant use or driving while significantly underinflated. Those facts can affect assessment. Leaving them out because they feel embarrassing deprives the person helping you of useful information.
15. Know why repairability cannot be decided from the driveway
A screw in the tread is not automatically a repairable puncture. Location, injury size, prior repairs, internal condition and how the tire was used after losing pressure matter. USTMA's repair guidance explains that a proper assessment requires removing the tire from the wheel so its interior can be inspected. A photograph cannot provide that view.
A repair is also not the same as a temporary roadside measure. Follow the vehicle and product instructions if emergency mobility equipment is used, including any specific limits. Do not turn a temporary solution into a permanent one by ignoring the warning label. Tell the assessing provider which product was used and when, even if the tire seems to be holding air now.
The Calgary tire-repair information is a useful starting point for asking about assessment. It should not be read as a promise that your particular tire can be repaired. A provider may need to decline a repair after inspection. That outcome is not contradicted by an internet diagram showing a general repairable area.
For a new driver, the practical rule is simple: preserve the facts and avoid making the damage worse. Do not continue on a flat tire to reach a preferred destination, pull an embedded object for curiosity, or use sealant merely to postpone an inspection you already know is needed. Arrange appropriate help and keep the decision tied to the actual condition.
16. Rehearse a roadside decision without doing roadside work
Discuss a hypothetical sudden tire problem while the car is safely parked. The driver should know that maintaining control comes first. Avoid abrupt steering or harsh braking, move out of traffic when it is safe, and follow the vehicle's emergency guidance. The exact response depends on the road, vehicle and circumstances, so practise the decision process rather than memorizing an inflexible manoeuvre.
Once stopped, location can be the biggest hazard. If you are exposed to traffic, a steep slope or another unsafe condition, do not start changing a wheel simply because the vehicle carries a jack. Contact appropriate roadside or emergency assistance. Follow instructions from responders. A spare tire's presence does not make every roadside location suitable for a wheel change.
Know whether the vehicle has a full-size spare, temporary spare, mobility kit or another system. Find the relevant manual section before an incident. A temporary spare can have specific speed, distance and usage restrictions. Those limits belong to the actual equipment; advice from a friend's different car is not an acceptable substitute. Check the spare's maintenance requirements as part of the regular routine.
Practise sharing a precise location and vehicle description. Identify the road, direction of travel and nearby safe landmarks without stepping into danger to read a sign. Tell assistance if passengers have needs that affect waiting or transport. A well-prepared novice does not need to become a roadside technician; they need to secure appropriate help without adding risk.
17. Use teach-back to confirm independence
End the first learning session by letting the new driver explain the process in their own words. Ask where the correct pressure comes from, why a warm reading needs context, and what they would report about a recurring low tire. Avoid prompting every answer. A small uncertainty discovered in a quiet driveway is easier to address than one discovered beside a busy road.
Try three scenarios. First, all tires were checked cold a month ago, but there has been no check since: the routine is due again. Second, one tire has a visible bulge: the trip should pause for appropriate assessment, regardless of the dashboard. Third, the tire warning appears after a seasonal change: consult the instructions and provider rather than simply erasing it.
Ask the learner to distinguish observation from conclusion. “The steering wheel shakes at a certain speed” is an observation. “It needs balancing” is a proposed cause. “The right front lost pressure between two cold checks” describes evidence. “The valve must be bad” narrows the cause without inspection. This distinction keeps conversations productive and prevents a confident guess from becoming an instruction.
Repeat a short practical session after the learner has managed a few checks independently. Review the record and any confusing tool readings. Independence does not mean never asking for help; it means knowing what you can measure, where the reliable instructions live, and when the situation exceeds your ability. That is a stronger foundation than memorizing a list of tire facts once.
18. A first-month plan you can actually maintain
During the first week, build the vehicle card, practise the gauge and locate the roadside instructions. Establish a known starting record rather than assuming the previous driver left everything current. If the vehicle's tire history is unclear, arrange an appropriate condition and fitment assessment. A new notebook cannot supply missing service history or certify an old set.
Over the following drives, pay attention to changes without constantly searching for faults. Record a new warning, an impact, unusual handling or repeated pressure loss. Tell the responsible owner promptly. Do not perform sharp manoeuvres or deliberate hard braking to test grip on public roads. Learning the normal feel of a vehicle should happen through ordinary safe driving and qualified instruction.
Before a seasonal change, confirm what set you have, where it is stored, whether it has wheels and what assessment it needs. Before a longer journey, review pressures, condition, load instructions and emergency arrangements early enough to address a concern. Preparation works best when it precedes departure day, not when luggage is loaded and everybody expects the vehicle to leave.
The end goal is straightforward: a driver who can make a careful start-or-stop decision, provide accurate information, and seek the right help. Tires are not a subject you finish learning in one afternoon. But a repeatable check, an honest record and a sensible response to uncertainty will keep serving you long after the new-driver label disappears.
Keep a small learning kit, not an improvised workshop
A reliable pressure gauge is the first useful item. Choose one with a readable scale and a range suitable for the vehicle's specified pressures. For a beginner, a display they can read consistently is more valuable than an elaborate tool with unfamiliar settings. Store its instructions and learn whether it needs batteries, zeroing or another preparation step before trusting a surprising result.
A flashlight helps identify markings in a shaded wheel area, and gloves can make a routine check more comfortable. Keep a notebook or a simple phone template for the readings. If using a phone, save essential instructions locally as well as online. A roadside situation with poor reception is a bad time to discover that the only copy of the manual requires a new account or a large download.
A tread gauge belongs in the kit once the learner has practised using it. Do not pack a random collection of tire plugs, chemical products and lifting equipment on the assumption that owning them creates competence. Some equipment involves separate training and vehicle-specific instructions. More tools can create more opportunities for an improvised repair that should instead have been referred for assessment.
Check the kit periodically. A missing gauge, exhausted battery or unreadable instruction page can quietly undermine an otherwise sensible routine. After someone borrows an item, return it to its agreed place. The point is to reduce friction: if checking pressure requires searching three rooms for the gauge every time, even a motivated new driver is less likely to keep the habit.
Read the service receipt before filing it away
After tire work, ask for an explanation of what was completed and any follow-up instructions. Match the written tire description to what was agreed, and ask about anything you cannot interpret. Keep the receipt with the vehicle record. It can establish the date and work described, but it is not a lifetime guarantee that no new damage or pressure loss will occur.
If the provider gives a wheel-fastener recheck instruction, record the specified timing and arrangement accurately. Do not replace it with a number recalled from another vehicle or an internet comment. The correct fastener specification and procedure are vehicle and wheel dependent. A novice should not use an unfamiliar wrench to perform a recheck merely because it appeared on a checklist.
Confirm any advice about pressure monitoring, rotation restrictions or the seasonal set that was removed. If the provider identifies a concern outside tire service, record the concern and the appropriate next step without translating it into a confirmed mechanical diagnosis. “Have this symptom assessed by a suitable specialist” and “this exact part has failed” are not equivalent statements.
During the next ordinary drive, pay attention to new warnings or unexpected changes. If the vehicle feels unsafe, stop in a safe place and seek help; do not complete a planned route just to gather more evidence. If there is a non-urgent question about the work, provide the receipt, date and a clear description when you raise it. Good records make follow-up easier for everyone.
A parent or mentor can review the first receipt with the learner, then let the learner explain it back. They should know which tires were installed, which set is now stored, what instructions remain outstanding and where the documentation lives. That closes the learning loop: the driver is not simply delivering a car for an adult to manage, but taking responsibility for understandable, verifiable steps.
Primary references and where they apply
Transport Canada: inflating your tires supports using the vehicle manufacturer's pressure specification, cold-pressure measurement and regular checking. Use it alongside the actual vehicle placard and manual; it does not provide a universal pressure for every car.
Transport Canada: safety information about tires covers condition, tread and seasonal considerations. NHTSA's tire safety guidance provides additional explanations of tire maintenance, monitoring systems and responding to a blowout. Its United States context should not be confused with Alberta legal requirements.
USTMA tire-repair basics explains why demounting and internal inspection matter to puncture assessment. Vehicle and tire manufacturer instructions can impose additional restrictions. The examples in this guide are teaching scenarios, not customer stories, current inventory statements or remote diagnoses.